Settings (online booking)
In this part, we will describe some configurations of online booking for simple use. We will configure a service step by step so that we can see it in our online booking and use it.
The parameters of the online booking module can be found in My Clinic > Online booking.
You can find this part of the documentation by going to the section: online booking.
The key steps
1.Configure our service
It's important to configure the services offered online correctly. We advise clinics to review the services present via My Clinic > Services. You can review the documentation here: services list.
Make sure that these following configurations are correctly filled in for the services offered on the online booking module.
Let's admit we have/want a new service called Kinésithérapie in our service point Medexa (Longueuil) for the employee Camille DUPONT (this name is fictitious).
- Log in to the Medexa platform
- Go to My Clinic
- Then in the Services menu, on select Services list
- Add the "Kinésithérapie" service by clicking (+)
- Or we can modify it in the list

- In this new window we select
- Can be booked online
- Always
- Then we click on Save Changes
Note:
Our service will now be available in the Online booking section in My clinic. However, it must be made available at the appropriate service points and services.
2.Add the service to a service point
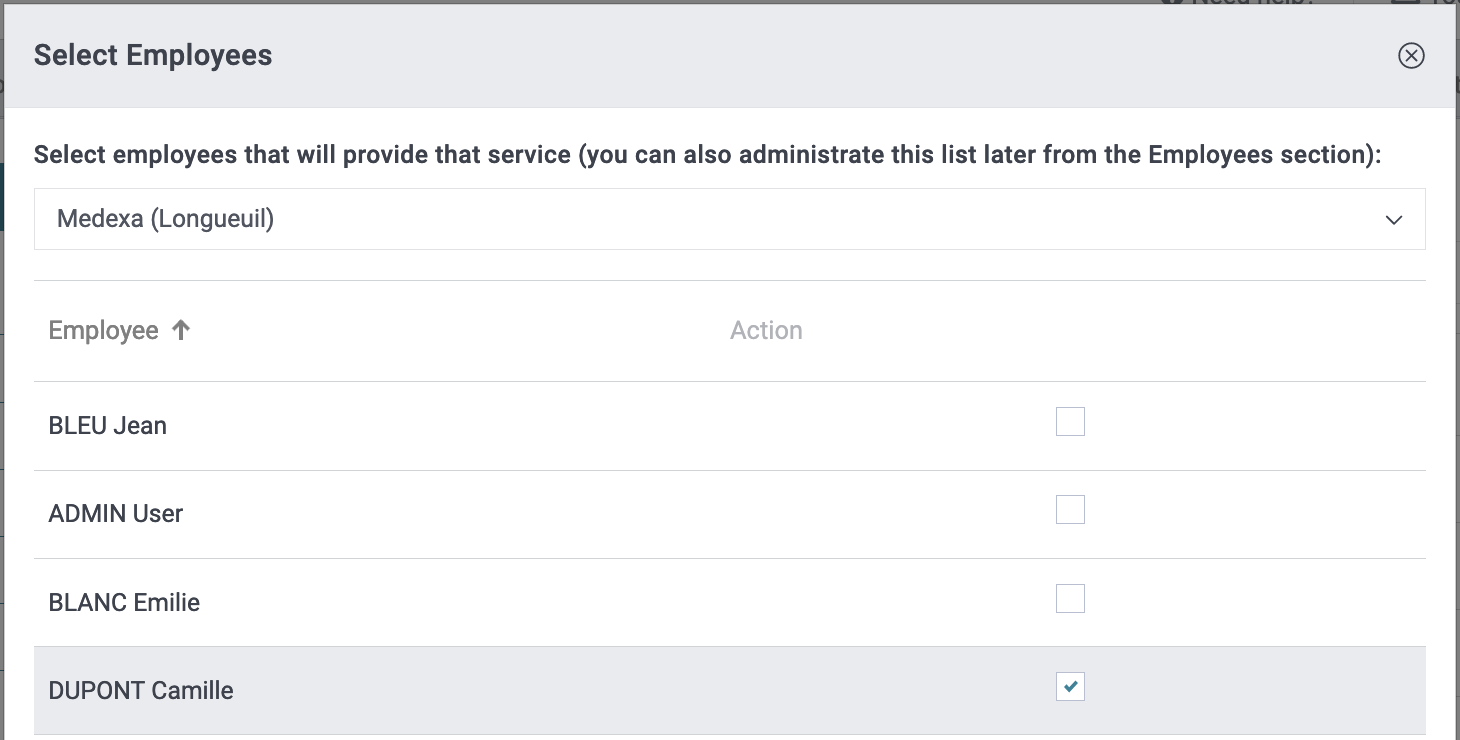
If we create a new service, as soon as we save it, we will have a new window that will offer us to add it to a point of service and/or an employee.
All you have to do is select the right point of service and the employee. Here in the example it will be Medexa (Longueuil) with the employee DUPONT Camille.
If we modify a service we will have to add it if it does not exist:
- Go to My Clinic
- Choose Services
- Select Assign services to points of service
- Choose the Medexa (Longueuil) service point
- Click on Assign / unassign
- A new window will open
- Choose the Kinésithérapie service
- Click on Save Changes

Note:
Our service is now available at the point of service, it must now be made available to our employee Camille DUPONT.
3.Add department to employee
If we modify a service we will have to add it if it is not available to the employee:
- Go to My Clinic
- Choose Services
- Select Assign services to employees
- Choose the Medexa (Longueuil) service point
- Click on Assign / unassign
- A new window will open
- Choose the Kinésithérapie service
- Click on Save Changes

**Note:**Our service is now available for the employee Camille DUPONT.
4.Make online booking available
To be able to use online booking, it must be made available.
For this you have to go:
- Go to My Clinic
- Choose Online booking
- Go to Global Configuration
- You have the possibility to select several options, if you want more information, you can go to the section: make an appointment online.
- Click on Save Changes

5.Add availability for the employee
Once the activation of our online booking, we must make available a schedule to the employee
If we don't, the service will not be available for online booking.
For this you have to go:
- Go to My Clinic
- Choose Online booking
- Go to Individual configuration
- Choose a service point
- Choose an employee
- If the employee already has availability, they will be displayed

- Click on New availability period
- A new window will open
- Choose the begin of period and the end of period in which the appointments could be available.
- Click on Save Changes

- Our new availability period will now be visible

- In the Actions drop-down menu, choose Edit availability
- A new section will be visible
- Choose a day and click on the button Add
- Here we will take Wednesday

- A new window will be visible
- We will have to choose a start time and end time period
- Let's admit, Camille DUPONT works between 08:00 and 18:00
- If we go with our mouse over the service, we will see suggested hours. These hours depend on Camille DUPONT's working hours, configured in the User Management.

- Choose the service(s) and click on Save Changes.
Our new schedule is now available for our employee.

6.Make the point of service available in online booking
It is important to check if our point of service is well configured.
For this you have to go:
- Go to My Clinic
- Choose Online booking
- Go to Point of Service Configuration
- Choose service
- Select Available for online appointment
- Click on Save Changes

7.Make the employee available for online booking
We are almost at the end of our classic configuration.
We must check if our employee is available for online booking.
For this you have to go:
- Go to My Clinic
- Choose User management
- Go to Users
- Choose user

- Select Can be booked online
- Click on Save Changes

Note:
Maximum number of simultaneous appointment (0 for infinite): This setting limits the number of availabilities offered for the same time slot. If you leave this setting at 0, all your patients will be able to schedule their appointments at the same time slot with the chosen therapist since your maximum number of appointments is "infinite". For therapists available for online appointment scheduling, we recommend setting this setting to 1 to avoid scheduling conflicts. * Note that it is not possible to overlap simultaneous appointments at this time.
Now our new service will be available in online appointment booking. To see how to use it, see the section use (online booking).
Annexes
Appointment Colors
A white label "Online booking" is created for all clinics benefiting from the online booking module.
WARNING: Do not remove this tag!
In case you delete this label by mistake, please contact our support department: support@medexa.com
All scheduled appointments must have a color tag, so all appointments booked online are automatically assigned the tag "Online booking".
Tip: When you notice white appointments being added to your schedule, go take a look at the appointment. Once you have seen the appointment, change the label of the appointment to the one that applies as appropriate.
Online applications
Clinics that have decided to manually manage appointments made via the online booking module (which have not checked "Automatically accept requests") will have to use this section to manage appointment requests.
Online requests are accessible via Schedule > Online requests.
Clinics using this tab are notified by a red dot in the left margin and on the "Online Requests" tab when requests are pending acceptance. Clinics must therefore accept or refuse requests for the red dot disappear.
If the time of the appointment is not convenient for you, you have the necessary on the online application to contact the patient and make changes to the appointment before accepting it.
*Note that no email or text notification is sent to the therapist or clinic when requests are pending acceptance.