Activities
For a therapist, charting is a key element to ensure the proper follow-up of his patient files.
Charting keeping records all ongoing episodes of care for a patient. It is therefore possible to have several episodes of care in progress if a patient is treated by several disciplines at the clinic.

For more information on care episodes, see the following article: Billing Episodes.
Different options are available to you for writing and recording your activities on Medexa.
Note:
If your forms/canvas were not imported into your software by our team, please refer to the following article: (Creating Forms)
Note that until your forms/canvas are integrated into your Medexa account, you can use the option to import your forms to start keeping records by counting your notes manually.
Activity
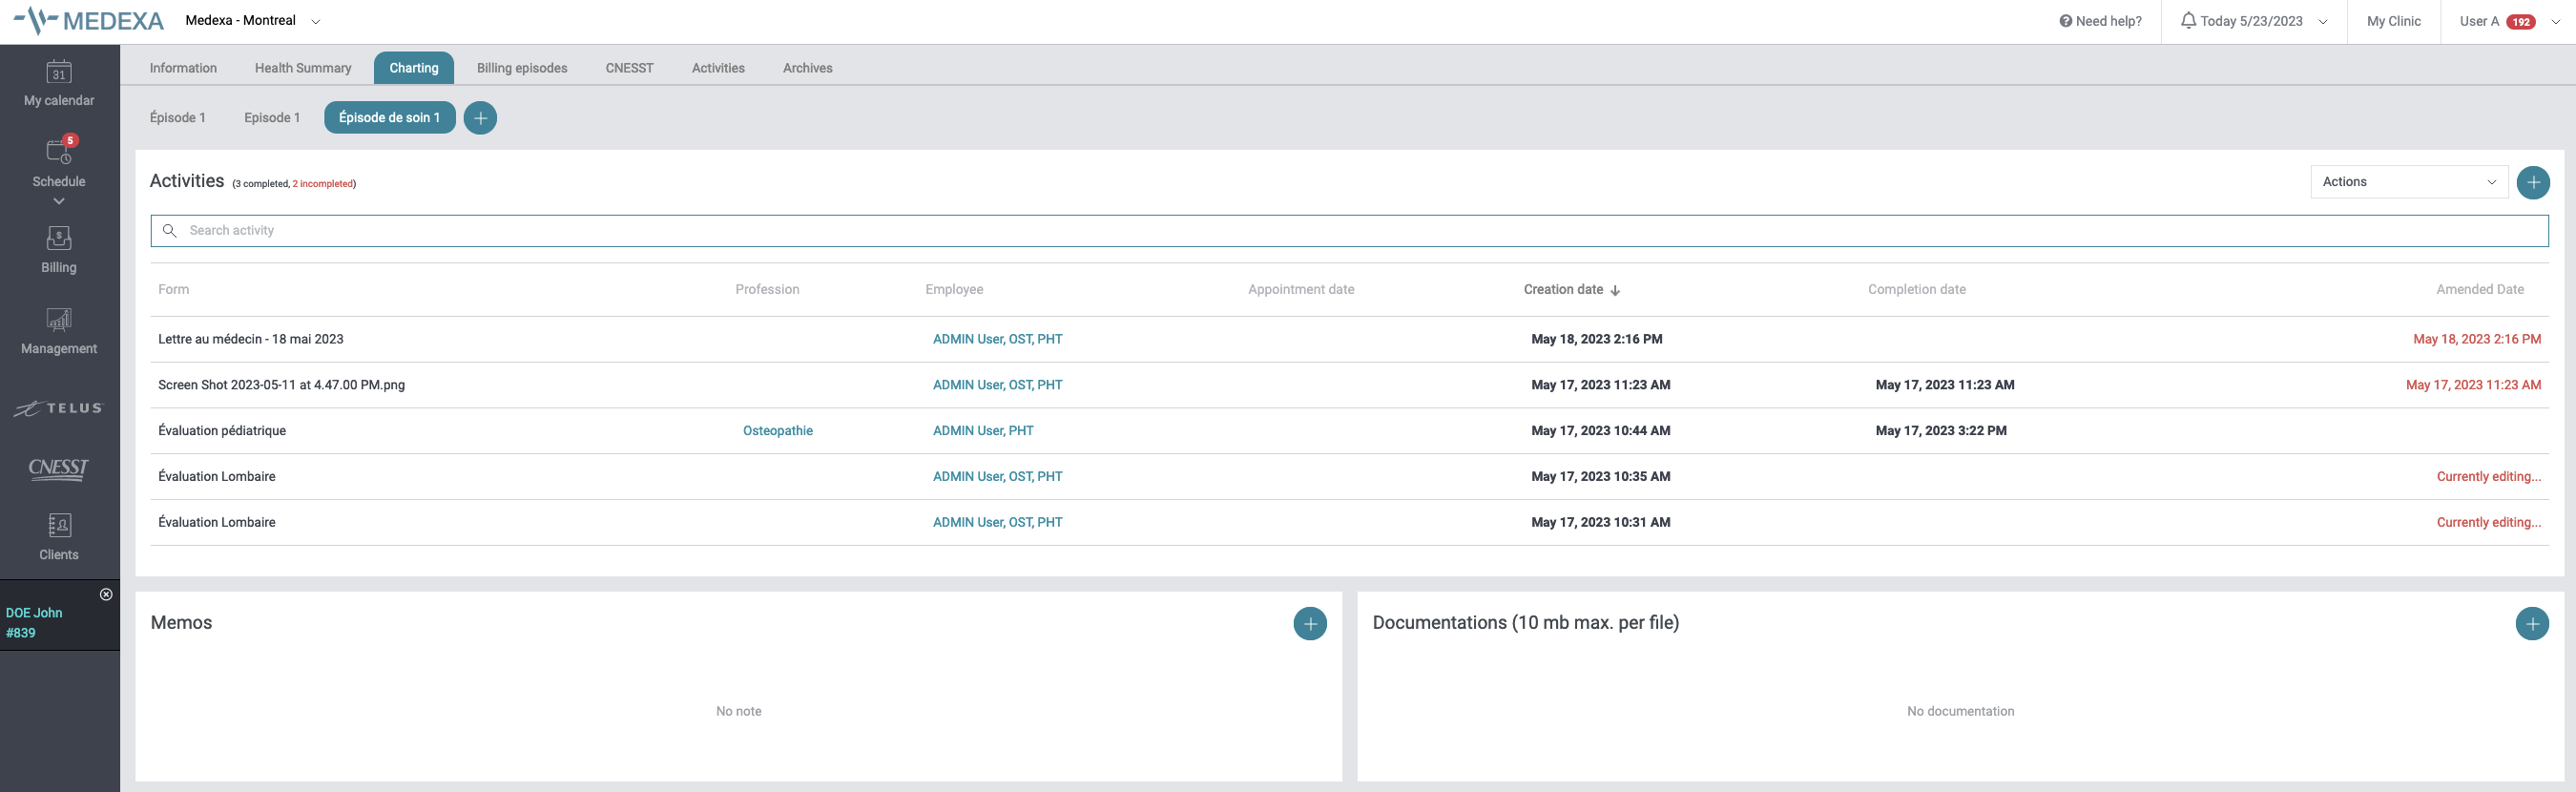
In the activities section, you will find all the activities created by the treating therapists for a treatment episode.
The following elements are found in this section:
- Shares
- Quick consultation: This option allows you to review completed activities without having to manually open them one at a time. By clicking on this feature, a window will open and using the drop-down menu at the top of it, it will be possible to select the note to consult. The "Previous" and "Next" buttons at the bottom of the window also allow you to quickly jump from one activity to another for an overview of the notes taken during the treatment plan.
- Download activities: This feature allows you to download, in PDF format, a selection of completed activities from the care episode. This is particularly useful when the patient or an external organization asks for an extract from the patient file. For more details on this feature, please see the following article: Export notes from a patient record
- Physiotec Exercise Programs: This feature requires a subscription to Physiotec services. For more information related to their services and the use of this integration, please consult Physiotec directly. If you are already registered, here are the steps to follow to create or view an exercise program:
- Click on “Physiotec exercise programs” in the drop-down menu
- To create a new exercise program:
- Click on “Create client”
- Click on “New exercise program”
- A tab that gives you access to the Physiotec platform will open in your browser
- Follow the guidelines provided by Physiotec to create the exercise program
- To view an existing exercise program:
- 1. Click on the "Synchronize" button if the list is not up to date
- 2. Click on the exercise program you want to view in the list
- 3. A preview of it will open in Medexa
- + (button) The + button at the top right of the “Activities” section allows you to add an activity in the episode by selecting a form from the list present or by clicking on the “Add a document” button to import a form external to Medexa. To learn more about the options available when taking notes on a scanned form on Medexa, see the following article: (Note Taking) Please note: Additions of external documents to Medexa must be in PDF format.
- Professions The "Professions" menu allows you to filter the activities displayed according to the profession assigned to the completed forms.
Fill out a form
- Start by opening the patient file
- Click on the Charting tab
- Select the care episode concerned (the last one created is automatically selected)
- Click on the (+) in the right corner of the Activities section
- A new window opens
- Click on the title of the form you wish to complete
- Click on Open
- Complete the sections of the form that apply to your note taking

Here is the description of the options:
- The pencil icon followed by No appointment assigned: to assign an appointment to the activity.
- Select a start date and an end date to set a period in which the desired appointment falls.
- When the appointment is displayed, tick the said appointment
- Click the Assign. Note: If you make a mistake, click the pencil icon again and click the yellow Unassign button.
- Privacy: to set the privacy level of the activity.
- Everyone: All users of your clinic have access to the activity.
- Custom: Check the user(s) who should have access to this activity.
- Save changes: to save the changes made to the form and be able to come back to it later to finalize it.
- Please note: A saved activity is still being edited and is only visible to the author of the activity. The activity will become apparent to all therapists once it is completed by the author.
- Complete: to generate the final version of your activity.
- Note: This action requires the password of the author of the activity to validate the manipulation since it is irreversible. This password is the same as when you log in to your Medexa account.
- Note: It is possible to create a second edition of the activity in case of error or omission, but the first completed version of a note will always remain in the patient's file to respect the rules of the different Groups, Professional Associations and Orders.
- Actions: to select among the possible additional actions...
- History of activities: to consult the other forms of the episode of care without having to leave the activity.
- Use the drop-down menu at the top of the window to select a specific activity.
- Click on the Next and Previous buttons to jump from one activity to another.
- Note: This feature can be used to retrieve information to avoid having to transcribe it from one activity to another. You can achieve this by selecting text from a previous activity and using the copy-paste option with:
- right click if you use a mouse
- two-finger click if you use a trackpad
- ctrl+c / ctrl+v if you prefer to use your keyboard on Windows
- command+c / command+v if you prefer to use your keyboard on Mac
- Transfer/Duplicate: to move or duplicate the activity from one care episode to another.
- If the desired care episode does not appear in the drop-down menu, check whether the care episode in question has been created before moving the note. To confirm, return to the Charting tab of the patient file.
- Note: This feature is particularly useful if you created your activity in a care episode of one of your colleagues or in a care episode that should have been archived.
- Delete: To delete the current activity or activity edit.
- Please note: The delete option is irreversible and it is only available if the activity is being edited. A completed activity cannot be deleted.
- History of activities: to consult the other forms of the episode of care without having to leave the activity.
In the lower right corner, you will also find two gray buttons that say :
- An arrow: to go back to the top of the form in one click
- A keyboard: to display the symbol bar to facilitate note taking
- Please note: The keyboard may disappear during your activity. Click on a text field to see it reappear at the bottom of the screen to access the symbol bar if necessary. To close the symbol bar, just click on the X in the upper right corner of the bar.
View / Edit an existing activity
To access an existing activity to consult it or create a new edition, you must open the patient's file, click on the Charting tab and select the relevant episode of care.
- Click on the activity in question
- The activity will open and you can view it
- Click on the Actions menu to access the following options:
- Edit: to be able to create a new edition
- Note: Clicking on Edit will put the activity back into edit mode. All the options and rules detailed in the section become available and applicable again. The new edition will be officially taken into account by the system only when the author completes it.
- Please note: Creating a new edition will not alter previously completed editions in any way.
- Please note: If more than one edit is created, an Edit button will be available at the top of the activity to view each of the completed edits for that activity.
- Generate a doctor's letter: to generate a doctor letter from this activity.
- For more details regarding this feature, please see this article: Send a letter to the doctor
- Transfer/Duplicate: to move the activity from one episode of care to another.
- If the desired care episode does not appear in the drop-down menu for this purpose, check whether the episode of care in question has indeed been created before moving the activity. To validate, return to the Charting tab of the patient file.
- Note: This feature is particularly useful if you created your activity in an episode of care of one of your colleagues or in an episode of care that should have been archived.
- Print: to print the activity.
- Please note: This feature is only available when the activity is completed.
- Dismiss Document: to identify erroneous activity by providing a reason.
- Note: This action requires the password when connecting to the software of the author of the note to validate the manipulation since it is irreversible.
- Please note: Once the activity is marked erroneous, it will be crossed out in red and only the author of the activity will see it in the care episode activity list.
- IMPORTANT: The Medexa team does not delete activities from patient records. In the event of an error, this feature should be used to indicate the error and ensure that record keeping is accurate and up to date.
ATTENTION: Some of the features mentioned in this article will only be available and visible to the author of the activity. If you don't see some of the detailed options, please refer to the author of the activity.
Import a form
This option is used when a clinic needs to add an external document to Medexa in a patient's Charting. It may also happen that you have to add a specific document to your patient files on an ad hoc basis.
Note: Be aware that you can add a "scanned" form, file or document to the Health Summary and/or Charting sections of your patient records.
- Click on the Clients section
- Find the patient in question
- Click on the patient's name
- Go to the Health Summary or Charting tab
- Health summary >>> If the document to be added deals with the general condition of the patient
- Charting >>> If the document to be added refers to the ongoing follow-up
- Select the episode of care concerned
- Click on the (+) in the right corner of the Activities section
- Click the Add Document button
- A new window opens

- If the document to be inserted is accessible, drag and drop it into the box for this purpose, otherwise click on Choose a file
- Find the file from your workstation folders
- Double-click on the file OR select it and click on Open
- The next window allows you to rename the file before saving it in the episode of care (Optional)
- Click on Save Changes
Once the file has been added to the activity list, certain actions are available by consulting the note:

- Pencil icon following the file title: to rename the activity
- Privacy: to configure the privacy level of the note.
- Download: to download the note
- Dismiss Document: to identify the note as erroneous by providing a reason.
*Have you added the document too quickly and gave it the wrong title? You will find the steps to follow to rename an activity right here: Rename an activity